Before downloading and using the PRMTransfer utility, please read below:
As the application is at Beta stage, don't use it with live data. Before using it, backup/export your projects or Primavera database. PRM will not be responsible for any problems or data loss resulting from the use of this utility. Use it at your own risk.
This utility is developed for Primavera P6 release 8.0 onwards. Version 7.x not supported. Also for Professional version 19 and above are not supported.
Since Primavera API do not support SQLite database, the PRMTransfer utility will not work with SQLite database. We are sorry for the inconvenience!
Primavera P6 is running on SQL Server but with no Unicode support. So if you are using a different codepage than Latin1 on SQL server, you have to be careful when importing data with special characters in it.
Please drop us an email if you need support.
Setup
Download the archive file by clicking the link below. Extract it to a new folder.
Before running the application, please do an XML export with Primavera P6 for once. This will make sure API files are in place and running. You need to do it just once, not every time you run the utility. If you are getting errors when doing XML export, please contact Primavera support.
Run PRMTransfer.exe located in the folder you extracted the archive files.
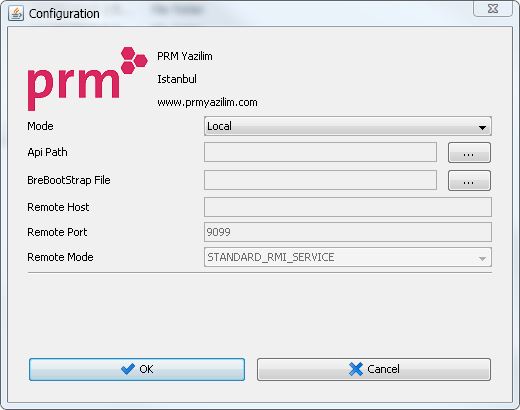
Choose "Local" as Mode in the configuration screen.
Choose "<Primavera P6 installation folder>/Pro/Java" folder as API Path.
As BreBootStrap File, you need to select the "BREBootStrap.xml" file used by Primavera P6. The "BREBootStrap.xml" file should be located in the <Primavera P6 install folder> / Pro / Java folder. If you cannot find it in this folder, you can search for it in an environment such as "C: \ Users \ <Username> \ AppData \ Local \ Oracle \ Primavera P6 \ P6 Professional" and copy it to <Primavera P6 installation folder> / Pro / Java folder. Select this file as BreBootStrap file after copying. Then open the application with "OK".
Enter your Primavera username and password to login to the application.
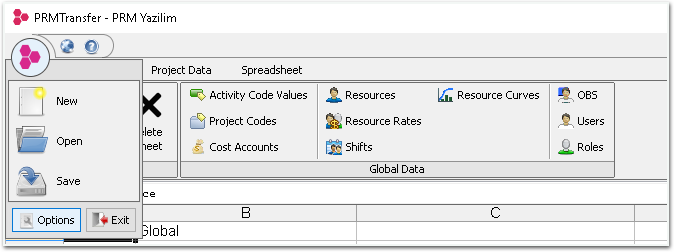
There are buttons in toolbar to retrieve global and project data like Resources, WBS, Activities. As you expect, in order to export and import project specific data like WBS, Activities, Resource Assignments, you first need to select a project from the toolbar dropdown.
You can configure columns to be exported and imported by the Options screen available in the main menu.
You may save your exported data as Excel files by selecting File|Save command. Then you may continue to edit data with MS Excel and use File|Open command to open edited XLS files. You can always copy paste data between Excel and the utility.
To import the data on the sheets to P6 database, please use Send to P6 button in the toolbar.
The update operations use ObjectId fields in the sheets. If ObjectId is blank, that row is added as a new record.
With the Beta release only importing global activity codes are supported.
Troubleshooting
If you are being asked for the API path when you run the application, please select the <Primavera P6 install directory>/Pro/Java folder (like C:\Program Files\Oracle\Primavera P6\P6 Professional\Pro\Java). This path is supposed to be detected by the application but in some cases the API could not be found in the Windows registry.
If you are getting "Unable to get database instances" on startup, it is likely that your Primavera database is not running or not accessible. Please check if database services are running and Primavera P6 is connecting the database.